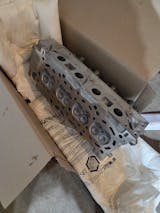
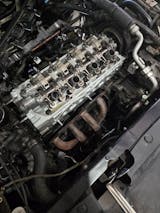
If you've ever peeked under the hood of your car, you probably know that the engine is a complex and intricate piece of machinery. Within this mechanical marvel, there's a critical component known as the head gasket, which plays a pivotal role in sealing the gap between the engine block and the cylinder head. The performance of the engine can be diminished when this gasket wears out or leaks over time. When it's time to replace the head gasket, cleaning the head gasket surface is a crucial step to ensuring a proper seal. You will find everything you need to know about effectively cleaning head gasket surfaces in this detailed guide.
In This Article
Understanding the Head Gasket Surface
Before we jump into the cleaning process, let's take a moment to understand what the head gasket surface is and why it's so important. The head gasket surface, also known as the engine deck or engine surface, is the area where the head gasket sits. This surface is located at the top of the engine block, and it must be impeccably clean and flat for the head gasket to do its job effectively.
The head gasket itself is a thin metal or composite material that is sandwiched between the engine block and the cylinder head gasket. Among its main functions is sealing the combustion chambers to prevent coolant and oil from mixing with combustion gases, while maintaining pressure within the cylinders as well. This critical task is only possible if the head gasket surface is perfectly clean and free from any imperfections.
When fixing a gasket, why should the mating surface be cleaned?
Cleaning the mating surface before fixing a gasket is an essential step in various mechanical and industrial applications for several compelling reasons. First and foremost, a clean mating surface ensures a proper and effective seal between two components, preventing leaks and maintaining the integrity of the system. When contaminants such as dirt, oil, or old gasket material are present, they can create gaps or irregularities that compromise the seal's effectiveness, potentially leading to fluid or gas leakage.
Furthermore, a clean mating surface promotes gasket longevity and reliability. Over time, foreign particles and residue can accelerate gasket wear and deterioration, causing it to fail prematurely. By removing any impurities from the surface, the gasket can function optimally and endure longer, reducing the need for frequent replacements and associated maintenance costs.
In addition to preventing leaks and extending gasket life, cleaning the mating surface also contributes to improved overall system performance. A properly sealed system operates more efficiently as it retains the desired pressure levels, temperature control, and fluid containment. This efficiency is critical in various industries, including automotive, manufacturing, and petrochemical, where even minor leaks or inefficiencies can lead to substantial consequences in terms of safety, environmental impact, and operational costs.
When to Clean the Head Gasket Surface
Cleaning the head gasket surface is not something you do on a whim. It's typically done as part of a more extensive engine repair or maintenance job. Cleaning the head gasket surface might be necessary in the following scenarios:
1. Head Gasket Replacement
When replacing a head gasket due to a leak or engine overheating, it's essential to clean the head gasket surface thoroughly. This ensures a proper seal and prevents future issues.
2. Engine Rebuilding
During an engine rebuild, where you're disassembling and reassembling the entire engine, cleaning the head gasket surface is a must. In this way, the engine will function optimally and all components will fit together properly.
3. Removing Carbon Buildup
Over time, carbon deposits can accumulate on the head gasket surface. Cleaning it periodically can help maintain engine efficiency and performance.
4. Resurfacing
In some cases, the head gasket surface may become uneven or warped. Resurfacing is a process where a machine is used to mill the surface flat again. It is imperative to clean the area after resurfacing to ensure that none of the debris or residue is left behind.
Tools and Materials You'll Need
Gather the tools and materials you need before starting to clean the head gasket surface. The following is a list of what you'll need:
-
Safety Gear: Safety should always come first. Protect yourself from chemicals and debris by wearing safety goggles, gloves, and a dust mask.
-
Gasket Remover: This is a chemical solution designed to soften and remove old gasket material and adhesive.
-
Razor Blades or Scrapers: These are handy for gently scraping away remnants of the old gasket.
-
Brake Cleaner or Engine Degreaser: Surfaces can be cleaned with these solvents by removing oil, grease, and dirt.
-
Scotch-Brite Pads or Sandpaper: These are used for scrubbing and smoothing the surface. Choose a fine grit to avoid damaging the metal.
-
Cleaning Brushes: Small brushes can help you get into tight spots and clean hard-to-reach areas.
-
Clean Rags or Towels: You'll need plenty of these to wipe away debris and cleaning chemicals.
-
Precision Straight Edge: This tool helps you check the flatness of the head gasket surface.
- Feeler Gauge: Gaps or irregularities in the surface can be measured using this gauge.
- Shop Vacuum: To clean up debris and keep your work area tidy.
Now that you've got your tools and safety gear ready, let's dive into the step-by-step process of cleaning the head gasket surface.
Step-by-Step Guide: How to Clean a Head Gasket Surface
1. Preparation is Key
As a first step, make sure the area where you are working is well-ventilated. Cleaning agents can produce fumes that you don't want to inhale. Ensure that the engine is completely cold before you begin to work on it. Safety first!
2. Remove the Old Gasket
Begin by removing the old head gasket. This can be a bit tricky, as gaskets can sometimes stick firmly to the surface. The manufacturer will provide instructions on using a gasket remover. Typically, you'll apply the remover, wait for it to soften the gasket, and then carefully scrape it away with a razor blade or scraper.
3. Clean the Surface
Once the old gasket is removed, it's time to clean the head gasket surface. To remove loose debris and gasket residue, wipe them away with a clean rag or towel. Then, apply a generous amount of brake cleaner or engine degreaser to the surface. Once the oil and grime have been broken down, let it sit for a few minutes.
4. Scrub and Scrape
Using Scotch-Brite pads or fine-grit sandpaper, gently scrub the surface in a circular motion. This helps remove any stubborn residue and smooth out minor imperfections. Avoid gouges or scratches on the metal by not applying too much pressure.
5. Check for Flatness
After cleaning, it's essential to check the flatness of the head gasket surface. Lay a precision straight edge across the surface and use a feeler gauge to measure any gaps or irregularities. If you find any high spots or low spots, you may need to have the surface milled or resurfaced by a professional machine shop.
6. Final Cleaning
Once the surface is clean and flat, use a clean rag or towel to wipe away any remaining cleaning chemicals and debris. To ensure complete dryness, make sure there is no contamination on the surface.
7. Inspect and Test
Before proceeding with reassembly, inspect the head gasket surface carefully. Make sure the surface does not appear damaged, warped, or pitted. Before moving forward, it's crucial to address any issues you notice.
8. Apply a New Gasket
With the head gasket surface clean and in good condition, you can now apply a new head gasket. Gasket placement and torque specifications should be followed according to the manufacturer's instructions.
9. Reassemble the Engine
Reassemble the engine components in the reverse order of disassembly, following the manufacturer's recommendations for torque settings and sequence. Make sure to use new bolts or fasteners if required.
10. Torque to specifications
Properly torque all bolts and fasteners to the manufacturer's specifications. This ensures that the head gasket is compressed uniformly, creating a tight seal.
11. Double-Check Your Work
After reassembling the engine, double-check your work. Make sure all connections and components are secure. Then, fill the engine with coolant and oil as needed.
12. Start the Engine
Check the engine closely for leaks or issues after it has been started. If everything looks good, you've successfully cleaned the head gasket surface and completed the job!
How to identify if you have an aluminum or cast iron head or block?
Identifying whether you have an aluminum or cast-iron head or block in your engine is a crucial step, especially when it comes to maintenance or repairs. One straightforward way to determine the material is by checking the engine's weight. Aluminum components are notably lighter than their cast-iron counterparts, so lifting the hood and carefully assessing the engine's weight can provide a preliminary clue.
Another method involves using a magnet. Aluminum is non-magnetic, so if you bring a small magnet close to the head or block and it doesn't attract, you likely have an aluminum component. However, cast iron is magnetic, so if the magnet sticks to the surface, you're dealing with cast iron.
Additionally, you can consult your vehicle's documentation or contact the manufacturer to identify the engine components. Vehicle specifications provided by the manufacturer often include details about the engine materials used. If all else fails, consulting with a professional mechanic or using online forums dedicated to your specific vehicle make and model can provide valuable insights into identifying the type of head or block in your engine. Knowing whether your engine has aluminum or cast-iron components is essential, as it can affect repair methods, maintenance procedures, and even performance upgrades.
Conclusion
In the world of automotive maintenance, cleaning the head gasket surface might not be the most glamorous task, but it's undeniably crucial. A properly cleaned and prepared head gasket surface is the foundation for a reliable and leak-free engine. Whether you're tackling a cylinder head gasket replacement, an engine rebuild, or simply performing routine maintenance, following the steps outlined in this guide will help you achieve a clean and pristine head gasket surface. Get ready to give your engine some TLC by rolling up your sleeves and gathering your tools. You will notice a significant improvement in your car's performance and longevity. And remember, when you need quality replacement parts, Allied Motor Parts is here to support your automotive endeavors.


